I have been running my own mail server for years on my home broadband connection. Most of the time it has been running fine, and when the connection does go down it hasn’t been for long enough to cause any email problems. But what if I my mail server did lose its internet connection for a couple of weeks? Then my mail would start getting bounced back to the sender if it had nowhere to go.
Since a VPS (Virtual Private Server) is pretty cheap now I decided to get one to test as a backup MX. I decided to give Debian 10.8 a try since I haven’t used a Debian system for a very long time. I guess the method for setting up postfix on Debian would also be the same for Ubuntu and whatever else is based on those distros.
I am also using postfix for this experiment. My main mail server still uses sendmail so I am going to finally get to see how to configure postfix too :). I am going to want to make sure my backup mail exchanger has a valid SSL certificate, and to get one of them I will use letsencrypt. So first of all I will need to create a DNS record for the host, and start a webserver on it.
DNS records and SSL certificate
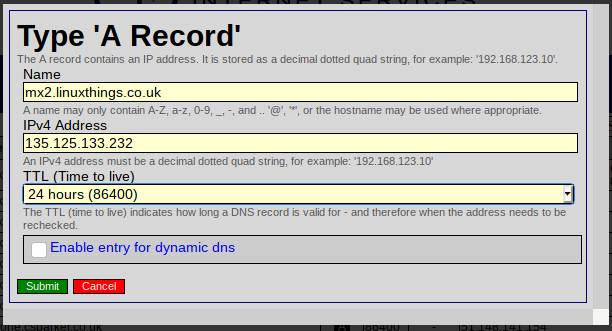
First of all you will need to login to your domain registrar or wherever you can manage the DNS for your domain and add an A record for your host. I’m going to use mx2.linuxthings.co.uk
You can also add an AAAA record if you have an IPv6 address. While we are here we might as well add the second MX record for the domain to set mx2 as a lower priority mail server.
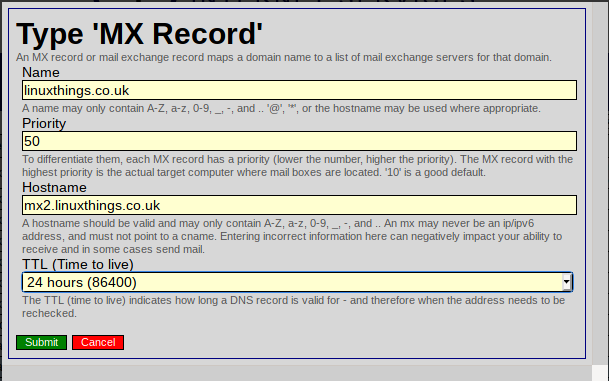
My domain already has a mail server with priority 10, so adding mx2 with a priority of 50 means it will be used after first trying my main mail server. It is OK to add this record now because I don’t already have a mail server running on mx2 at this point so if anything did try to talk to it then it would just fail and keep the message queued.
Now to install nginx web server and letsencrypt certbot to get the SSL certificate. This can be done by just installing the python3-certbot-nginx package which will install the rest of the dependencies for you.
~$ sudo apt update
~$ sudo apt install python3-certbot-nginx
Now that nginx is installed you will need to set its servername to be the same one as you used in your A (or AAAA) record up above. The configuration of the default site can be found in /etc/nginx/sites-enabled/default. I usually use vim for editing files, but nano seems to be the favorite when writing instructions 🙂
~$ sudo nano /etc/nginx/sites-enabled/defaultLook for the line with server_name in it and change it (mine was about half way down the file) server_name mx2.linuxthings.co.uk
You can now restart nginx with the new settings and run certbot which will generate SSL certificates and configure SSL for the server_name you just set. Assuming this server has a fresh install of nginx you just should need to select site 1 from the certbot menu. When asked if I would like to redirect HTTP to HTTPS I chose option 1 for no redirect, since this isn’t going to be used as a web server, just mail.
~$ sudo service nginx reload
~$ sudo certbot
Saving debug log to /var/log/letsencrypt/letsencrypt.log
Plugins selected: Authenticator nginx, Installer nginx
Which names would you like to activate HTTPS for?
- - - - - - - - - - - - - - - - - - - - - - - - - - - - - - - - - - - - - - - -
1: mx2.linuxthings.co.uk
- - - - - - - - - - - - - - - - - - - - - - - - - - - - - - - - - - - - - - - -
Select the appropriate numbers separated by commas and/or spaces, or leave input
blank to select all options shown (Enter 'c' to cancel): 1
You should see a Congratulations! message and your new certificate stored in /etc/letsencrypt/live/mx2.yourdomain.com/. The files we will need for postfix are fullchain.pem and privkey.pem.
Installing and Configuring postfix
Now we have the SSL certificate we just need to tell postfix to use them, and set it up to accept mail for our domain and queue it until the real mail server can be contacted. First of all install postfix
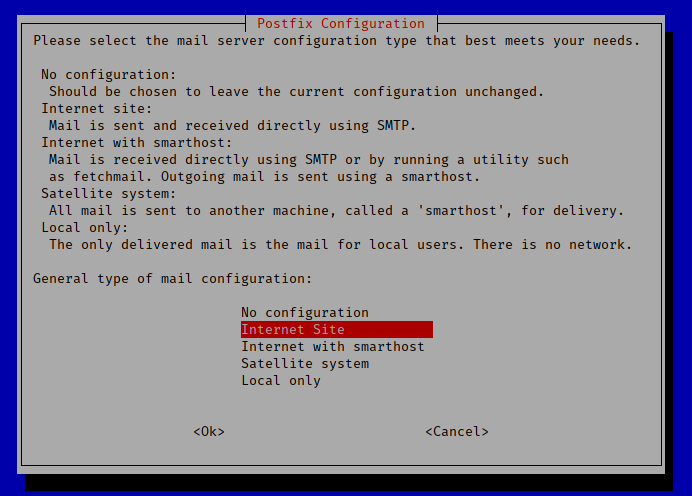
~$ sudo apt install postfixYou will be asked for a couple of configuration options, on the first screen choose Internet Site
and on the next screen set your mail servers name to the name you registered in DNS at the start postfix mail server name
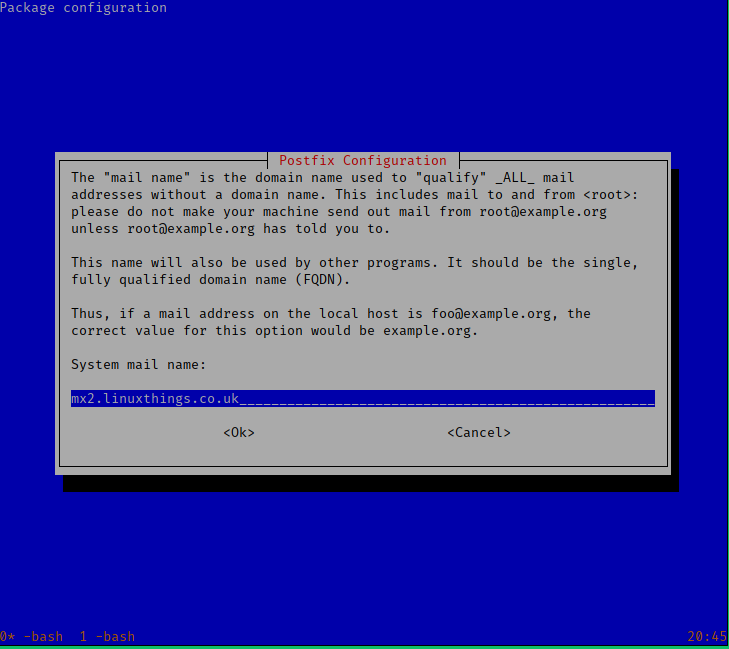
Make sure you don’t put your mail domain name as the system mail name otherwise postfix will be configured to accept mail for your domain, and not forward it on to your real mail server. This could mean mail will get rejected and bounced back, or just delivered to a mailbox on the backup MX that you never look at.
Now you can edit your postfix configuration file main.cf
~$ sudo nano /etc/postfix/main.cfScrolling down the default main.cf, the first things you will come across to change are the smtpd_tls_cert_file and smtpd_tls_key_file options. Update these to point to the files created earlier by letsencrypt certbot
smtpd_tls_cert_file=/etc/letsencrypt/live/mx2.linuxthings.co.uk/fullchain.pem
smtpd_tls_key_file=/etc/letsencrypt/live/mx2.linuxthings.co.uk/privkey.pem
and make sure that smtpd_use_tls is set to yes.
A few more lines down, change the end of the smtpd_relay_restrictions line to reject rather than defer. It is set to defer by default to make sure you don’t get any permanent failures on your mail delivery in case you made a mistake in the configuration of your server or DNS records. To be safe you could leave it set to defer until you are sure everything else is set up correctly, but I am going to change mine now
smtpd_relay_restrictions = permit_mynetworks permit_sasl_authenticated reject_unauth_destinationnext change myhostname to be the DNS hostname
myhostname = mx2.linuxthings.co.ukAnd now you can add the domains you will relay mail for by adding relay_domains just under the mydestination option
relay_domains = linuxthings.co.uk, someotherdomain.comMake sure that the domains you are relaying for are not entered in the mydestination line, otherwise the mail will get stuck on or rejected by the backup MX.
These are all the settings you need to change to get the backup mail server to store and forward mail to your main mail server. By default postfix will store mail for 5 days before returning to sender if it couldn’t be delivered to the main server. I will change that to 2 weeks by adding the maximal_queue_lifetime option to the end of my main.cf
maximal_queue_lifetime = 14dYou can now save the configuration and restart postfix by running
~$ sudo service postfix restartTo test that it is working you will need to stop your main mail server by shutting down the service, and then send email to that domain and check that it is delivered to the backup MX. Then you can enable your main mail server again and after a few minutes the mail should be sent from your backup to your primary mail server. You can watch for incoming mail on the backup MX by using tail
~$ sudo tail -f /var/log/mail.log